Django
Django, built with Python, is designed to help developers build secure, scalable, and feature-rich web applications quickly and efficiently. Whether you’re a beginner looking to create your first dynamic website or an experienced developer aiming to enhance your skills, this tutorial will guide you through Django’s core concepts.
This also tutorial provides you with Django projects to help you apply your knowledge and build some cool web applications. These projects not only provide you with experience in building with the Django framework but will also add value to your resume. This Python Django tutorial teaches basic to advanced Django concepts for backend development. Learn topics like forms, templates, views, ORM, etc.
Django Framework
Django is a third-party Python framework that lets you write code that runs on a web server. Using Django, you write Python code, called a view, that is tied to a URL. When your users visit the URL, the Django view runs and returns results to the user’s browser. Django does a lot more than that though - it includes tools for doing the following:
Routing and managing URLs.
Encapsulating what code gets run per page visit.
Reading anf writing to databases.
Composing HTML output based on resuable chunks.
Writing multiuser-enable sites.
Managing users authentication and authorization to your site.
Web-based administrative tools that manage all these features.
Django’s primary purpose is building dynamic websites. In doing so, it uses a common architectural pattern for user interfaces known as the Model - View - Template:
Model: Represents the logic and data of an application independent of its use interface.
View: Presents data to the user, possibly with multiple views for the same data.
Template: An input and control mechanism the user uses to interact with models and views.
Your first Django site
Inside the terminal, create a directory for your project and a virtual environment inside of it:
$ mkdir TeslaPython
$ cd TeslaPython
...\> mkdir TeslaPython
...\> cd TeslaPython
TeslaPython$ python3 -m venv ./venv
TeslaPython$ source ./venv/bin/activate
(venv)TeslaPython$ pip install django
Create your Django project:
(venv)TeslaPython$ django-admin startproject TeslaPython
The new TeslaPython project directory looks like this:
TeslaPython/
|   TeslaPython
|       |-- _init_.py
|       |-- asgi.py
|       |-- settings.py
|       |-- urls.py
|       |-- wsgi.py
|___manage.py
Start the Django development server by running the following command:
(venv)TeslaPython$ python3 manage.py runserver
Terminal:¶Watching for file changes with StatReloader
Performing system checks...
System check identified no issues (0 silenced)
You have 18 unapplied migration(s)...
Django version 5.1.1, using setting 'TeslaPython.settings'
Starting development server at http://127.0.0.1:8000/
Quit the server with CONTROL-C
To create an app in your project, you use the startapp management command. Inside your project directory, create the home app by running the following:
(venv)TeslaPython$ python3 manage.py startapp account
Your project directory tree now contains the home directory and the app skeleton files (We use VSCode):
TeslaPython/
|   TeslaPython
|       |-- _init_.py
|       |-- asgi.py
|       |-- settings.py
|       |-- urls.py
|       |-- wsgi.py
|___account
|       |-- _init_.py
|       |-- admin.py
|       |-- app.py
|       |-- migrations
|       |   |__ __init__.py
|       |-- models.py
|       |-- tests.py
|       |-- views.py
|____manage.py
To register your newly created “account” app, open TeslaPython/TeslaPython/settings.py and add your app’s name to the list, as in the following listing.
INSTALLED_APPS = [
    "django.contrib.auth",
    "django.contrib.admin",
    "django.contrib.contenttypes",
    "django.contrib.messages",
    "django.contrib.sessions",
    "django.contrib.staticfiles",
    "account"
]
Django includes a management tool called the Django Admin. When you regsiter your credits view, you’ll be adding this along with the existing mapping. To do this, open TeslaPython/TeslaPython/urls.py and change it to look like the following listing.
TeslaPython/TeslaPython/urls.py¶from django.contrib import admin
from django.urls import path
from accounts import views as account_views
urlpatterns = [
path("admin/", admin.site.urls),
path("accounts/", include("accounts.urls")),
]
Visiting your view, run thr Django cammand-line utilities to create the database tables automativally: The makemigrations command looks at all your available models and creates migrations for whichever tables don’t already exist, migrate runs the migrations and creates tables in your database.
$ python3 manage.py makemigrations
$ python3 manage.py migrate
...\> py manage.py makemigrations
...\> py manage.py migrate
$ python3 manage.py runserver
...\> py manage.py runserver
Terminal:¶Watching for file changes with StatReloader
Performing system checks...
System check identified no issues (0 silenced)
Django version 5.1.1, using setting 'TeslaPython.settings'
Starting development server at http://127.0.0.1:8000/
Quit the server with CONTROL-C
Templates
Manageing HTML-like code through templates.
Rendering templates based on context data.
Template tags and filters.
Using the render() shortcut inside views.
Composing and inheriting templates for HTML reuse.
Django provides four constructs:
Variable redering via matched double braces: {{ name }}
Script actions, like conditionals and loops using tags: {% now “Y” %}
Comments: {# a comment #}
Output modification via filtering data: {{ name | upper }}
Django shell:
$ python3 manage.py shell
...\> py manage.py shell
Django ORM (Object Relational Mapping) and Cloud
Interacting with a database through the Django ORM
Creating objects that map to database tables
Querying the database
Building object relationships
Loading ans storing content through fixtures
At the heart of an ORM is a mapping between Python classes and tables in a relational database. To define your first model class, edit TeslaPython/account/models.py, and change it to look like the following listing.
TeslaPython/account/models.py¶from django.db import models
class Profile(models.Model):
user = models.OneToOneField(User, on_delete=models.CASCADE)
name = models.CharField(max_length=200, blank=True)
def __str__(self):
return self.name or str(self.user)
Now, you need to create the corresponding table in the database. By default, Django is configured to use SQLite as its database. SQLite is local, single database.
So we will use PostgreSQL that is a powerful, open-source relational database management system and is used as a database for many web applications, mobile and analytics applications. It supports both SQL (relational) and JSON (non-relational) querying.
Installing PostgreSQL and setup Postgre Render to run Web Service (macOS):
Firstly, you log into dashboard Render to setup Postgre Render. Sign in to Render via Github
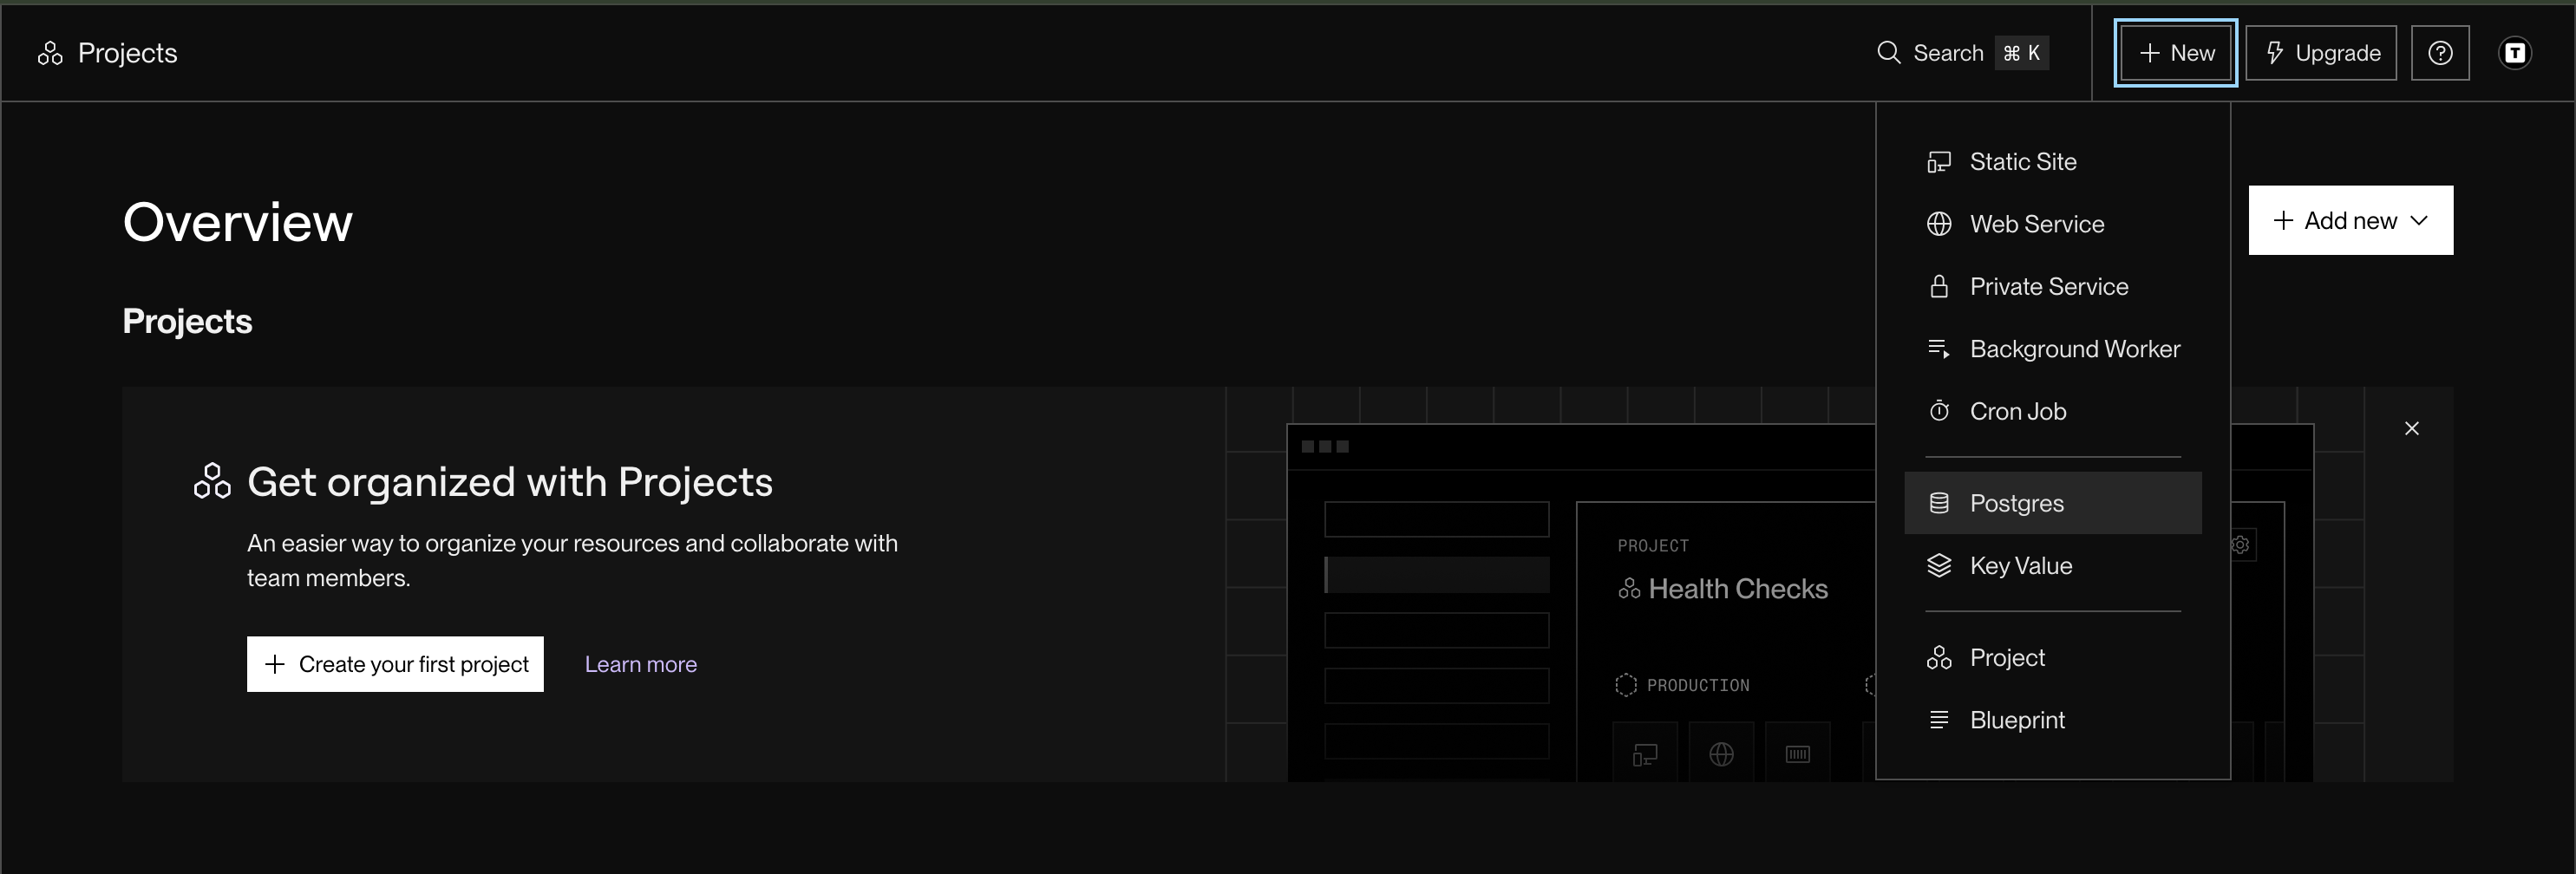
For example, enter the name something like this and then click Create Database (The remaining fields are emply)
New PostgreSQL¶Name: teslapython-postgresql-render
PostgreSQL Version: 16
and then copy Internal Database URL into settings.py in order to overwrite the existing DATABASES
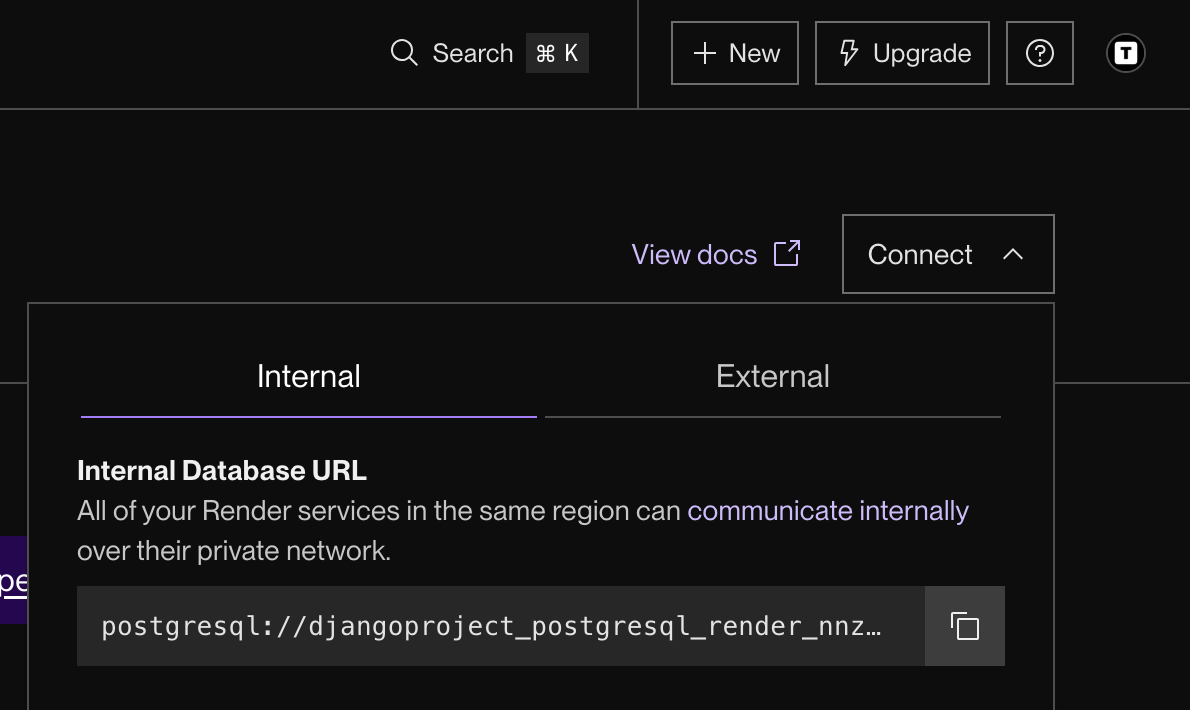
TeslaPython/TeslaPython/settings.py¶import json
import os
from pathlib import Path
import dj_database_url
#DATABASES Internal djangoproject-postgresql-render
DATABASES["default"] = dj_database_url.parse("postgresql://djangoproject_postgresql_render_nnzg_user:4cLGsFPvDPFObKQoixu0Tkicwc2yYfnu@dpg-cvhah33tq21c73e9ed6g-a.oregon-postgres.render.com/djangoproject_postgresql_render_nnzg")
Next, open VScode and installing dj-database-url and psycopg2-binary
TeslaPython/TeslaPython¶$ pip3 install dj-database-url
$ pip3 install psycopg2-binary
$ pip3 install gunicorn
$ pip3 install whitenoise
and run migrate again
$ python3 manage.py migrate
The next steps are for you to download PostgreSQL, and install it as belows (it is simple by click Next):
Setup¶Installation Directory (default): /Library/PostgrSQL/16
Select Components(choose all of them): PostgreSQL, pgAdmin 4, Stack Builder, Command Line Tools
Data Directory(default): /Library/PostgrSQL/16/data
Password(the same password in Postgres Render ):
Port(default): 5432
Locale(default): [Default locale]
Setup (Pre Installation Summary)¶Installation Directory: /Library/PostgrSQL/16
Server Installation Directory: /Library/PostgrSQL/16
Data Directory: /Library/PostgrSQL/16/data
Database Port: 5432
Database Superuser: postgres
Operation System Account: protgres
Database Service; postgresql-16
Command Line Tools Installation Directory: /Library/PostgreSQL/16
pgAdmin4 Installation Directory: /Library/PostgreSQL/16
Installation Log: /tmp/install-postgresql/log
Then, click Finish (remember uncheck at box “Lauch Stack Builder at exit?”)
If PostgresSQL could not start at port 5432 (the reason is that you uninstall PostgresSQL before or something like that), you can stop the process by finding the PID with:
$ lsof -i :5432
Command     PID     user
postgres    532     teslapython
...\> lsof -i :5432
Command     PID     user
postgres    532     teslapython
and then killing it with
$ kill -9 <PID> # PID is 532
$ kill -9 532
...\> kill -9 <PID> # PID is 532
...\> kill -9 532
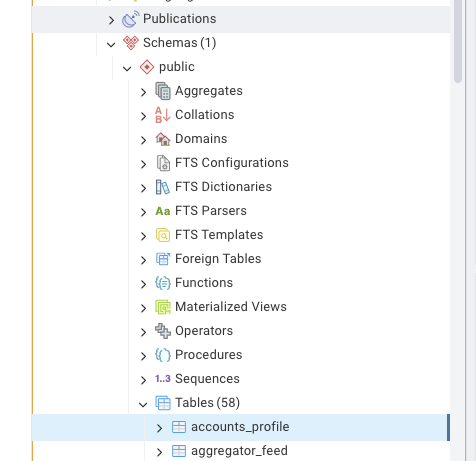
Now, open Launchpad –> pgAdmin 4 –> Servers –> PostgreSQL 16 –> Connect to Server (please enter password: the same password in Postgres Render created)
You could find the password in Postgresql Render created
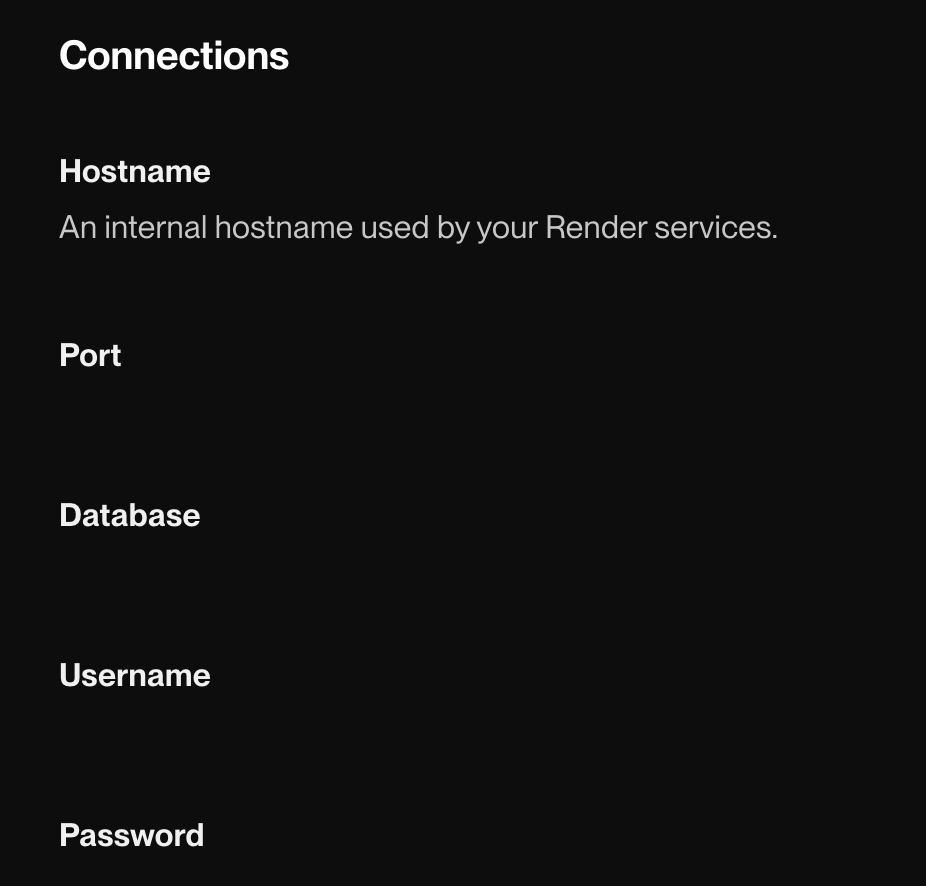
Next, right click at PostgreSQL 16 ( you see PosrgreSQL 14 as the below image because I use PostgreSQL 14) in pgAdmin 4 and fill the whole fields like Postgresql Render created.
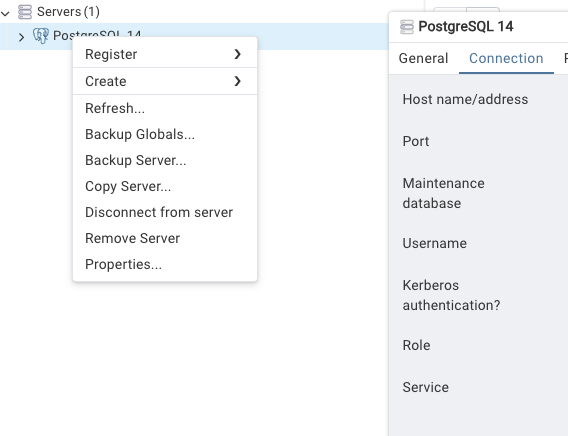
Connect to pgAdmin4 successfully like this
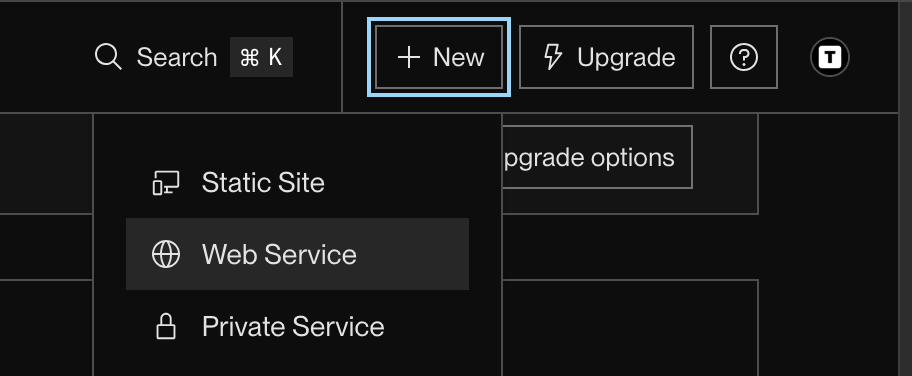
Next, we connect to Web Service to run your own website on Render:
In order to do that, we should push your code to GitHub:
TeslaPython/TeslaPython¶$ git init
$ git add .
$ git commit -m "first commit"
$ git branch -M Main
$ git remote add origin http://github.com/teslapython/teslapython.git #the name of your project when you create it in Github
$ git push -u origin main
Adding your domain name and Whitenoise to settings.py
TeslaPython/TeslaPython/settings.py¶ALLOWED_HOSTS = [
"www.teslapython.com",
"teslapython.onrender.com",
"localhost",
"127.0.0.1",
"localhost:8000",
"www.teslapython.onrender.localhost",
"teslapython.onrender.localhost",
] + SECRETS.get("allowed_hosts", [])
# The full path to the repository root.
BASE_DIR = PROJECT_PACKAGE.parent
data_dir_key = "DJANGOPROJECT_DATA_DIR"
DATA_DIR = (
Path(os.environ[data_dir_key]) if data_dir_key in os.environ else BASE_DIR.parent
)
try:
with DATA_DIR.joinpath("conf", "secrets.json").open() as handle:
SECRETS = json.load(handle)
except OSError:
SECRETS = {
"secret_key": "xyz",
"superfeedr_creds": ["any@email.com", "some_string"],
}
MIDDLEWARE = [
"django.middleware.security.SecurityMiddleware",
"django.middleware.clickjacking.XFrameOptionsMiddleware",
"django_hosts.middleware.HostsRequestMiddleware",
# Put LocaleMiddleware before SessionMiddleware to prevent
# the former from accessing the session and adding
# 'Vary: Cookie' to all responses.
"djangoproject.middleware.ExcludeHostsLocaleMiddleware",
"django.contrib.sessions.middleware.SessionMiddleware",
"django.contrib.messages.middleware.MessageMiddleware",
"django.middleware.csrf.CsrfViewMiddleware",
"django.contrib.auth.middleware.AuthenticationMiddleware",
"django.middleware.common.CommonMiddleware",
"django.contrib.flatpages.middleware.FlatpageFallbackMiddleware",
"django.contrib.redirects.middleware.RedirectFallbackMiddleware",
"django_hosts.middleware.HostsResponseMiddleware",
"whitenoise.middleware.WhiteNoiseMiddleware",
]
STORAGES = {
'default': {
'BACKEND': 'django.core.files.storage.FileSystemStorage', # or another backend like S3
'LOCATION': '/path/to/your/storage/directory', # or S3 settings if using S3
},
"staticfiles": {
"BACKEND": "whitenoise.storage.CompressedManifestStaticFilesStorage",
},
}
STATICFILES_ROOT = [str(PROJECT_PACKAGE.joinpath("assets"))]
creating a new file build.sh at the same path manage.py:
buid.sh¶#!/usr/bin/env bash
set -o errexit # exit on error
pip install -r requirements.txt
python manage.py collectstatic --no-input
python manage.py migrate
Add “export DJANGOPROJECT_DATA_DIR=~/.djangoproject” (without the backticks) to your ~/.bashrc (or ~/.zshrc if you’re using zsh, ~/.bash_profile if you’re on macOS and using bash) file and then run source ~/.bashrc (or source ~/.zshrc, or source ~/.bash_profile) to load the changes.
Terminal(macOS):¶$ ls -a
.zprofile
.CFUserTextEncoding .zprofile.pysave
.DS_Store .zsh_history
.Trash .zsh_sessions
.anaconda .zshrc
.bash_history .zshrc.save
Terminal(macOS):¶$ sudo vi ~/.zshrc
export DJANGOPROJECT_DATA_DIR=~/.djangoproject # add this to here, enter :wq to write and quit
$ source ~/.zshrc
In order to Render deploys your app, we should create requirements.txt:
TeslaPython/TeslaPython¶$ pip3 freeze > requirements.txt
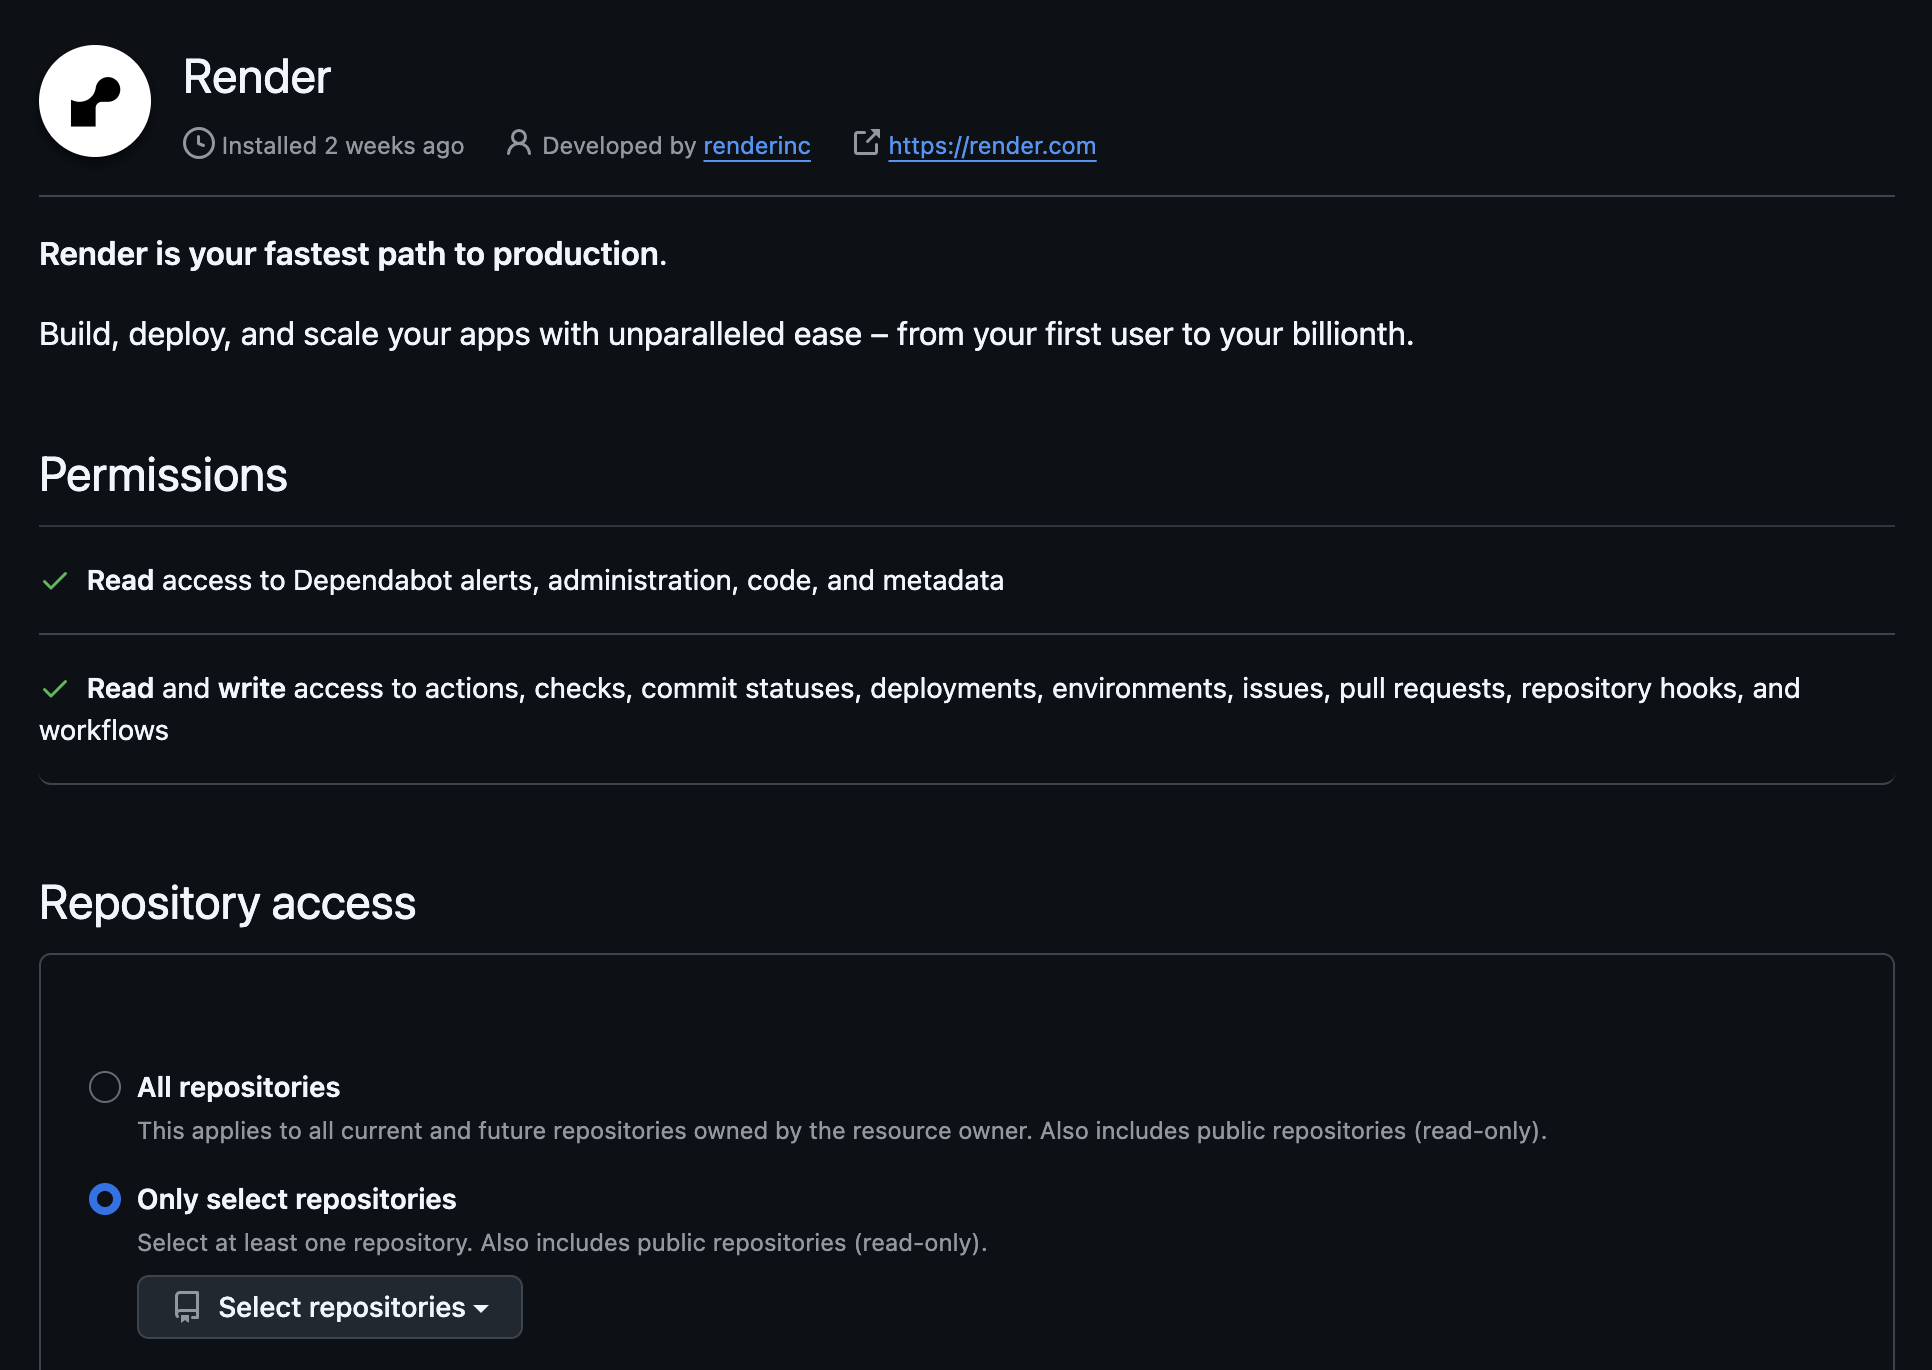
Connecting Render with your github to deploy your web service, select repositories –> Save and then Settings:
Settings¶Name: teslapython
Runtime: Python3
Build Commnad: $ sh build.sh
Start Command: gunicorn TeslaPython.wsgi: application
After that, we go to Environment to set up ALLOWED_HOSTS and DATABASE_URL, for example:
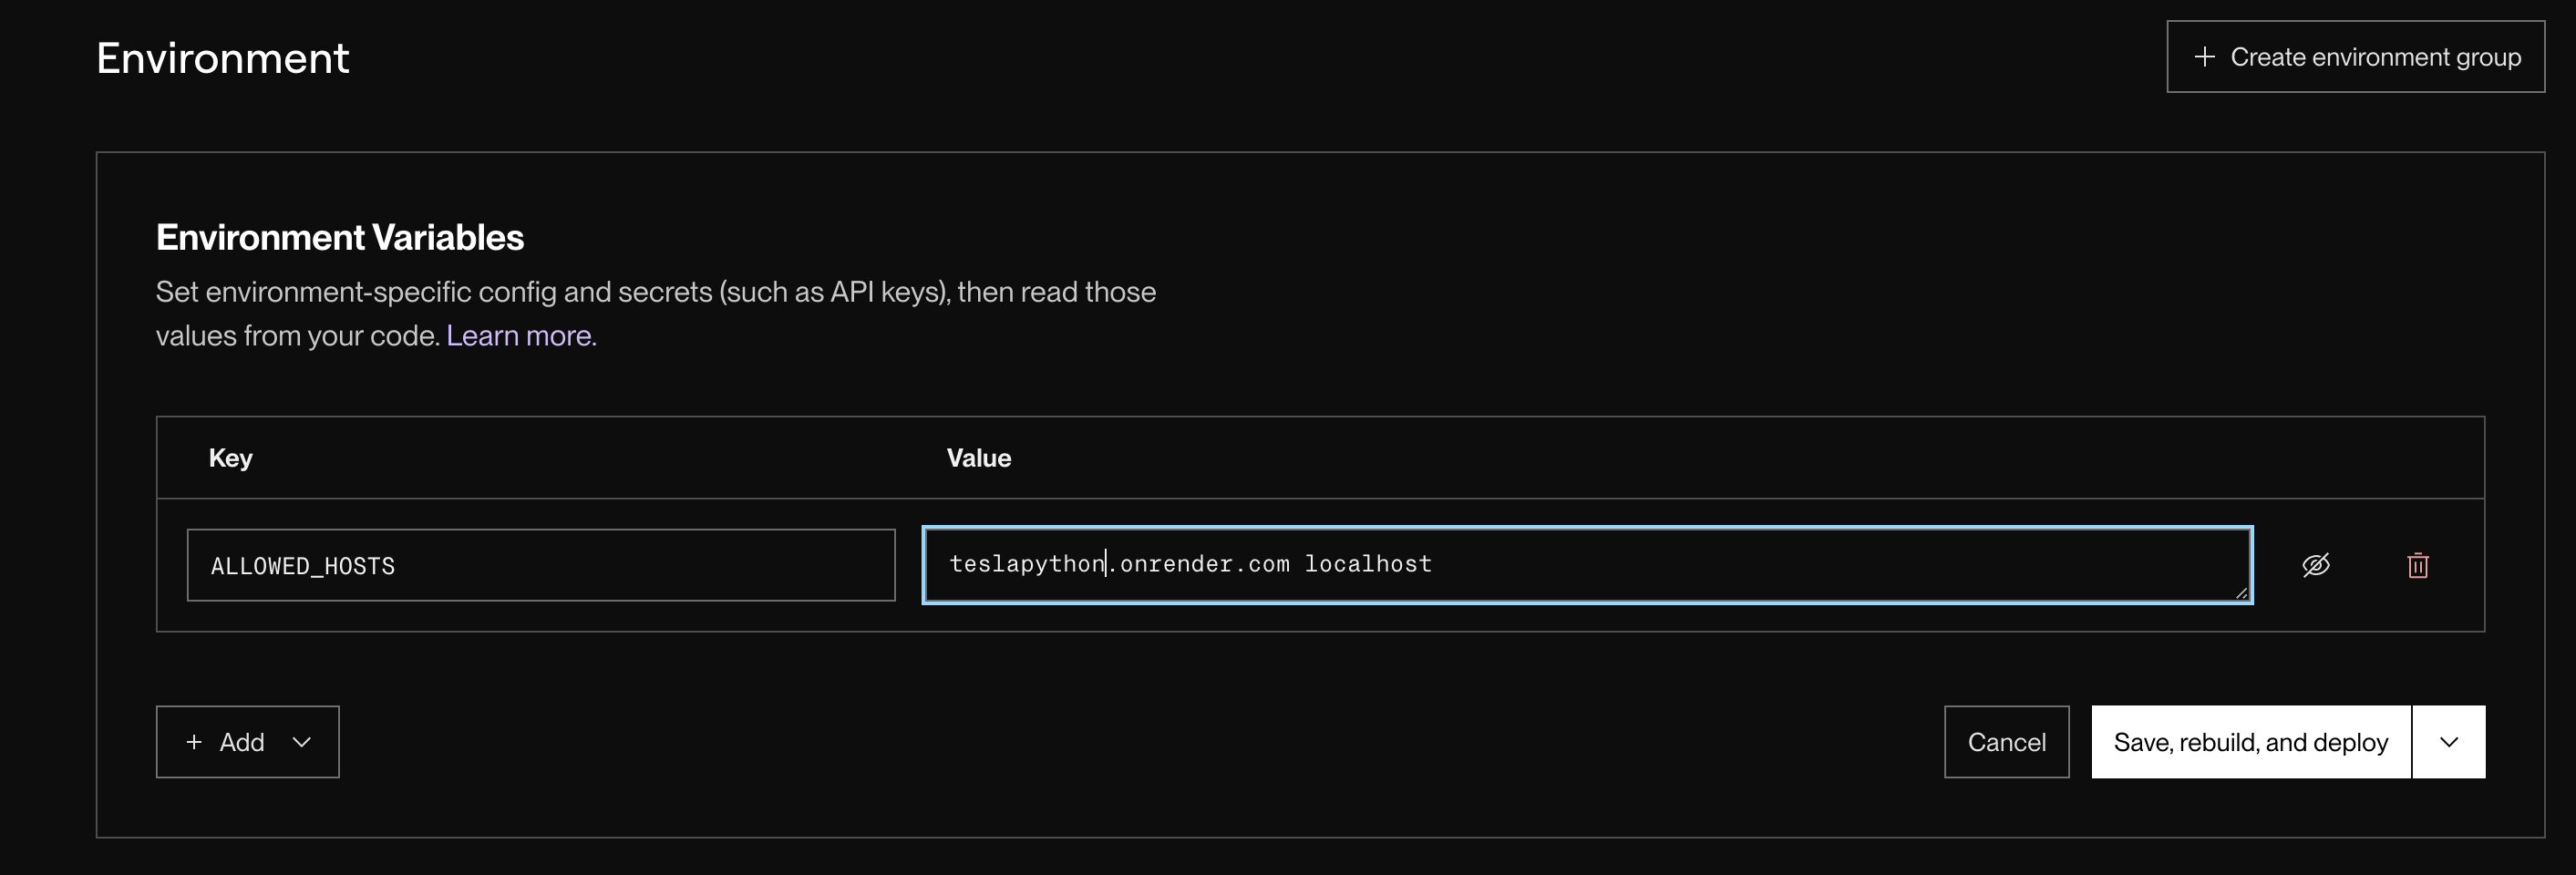
Enter Create Web Service
Django admin
A clean, elegant URL scheme is an important detail in a high-quality web
application. Django encourages beautiful URL design and doesn’t put any cruft
in URLs, like .php or .asp.
To design URLs for an app, you create a Python module called a URLconf. A table of contents for your app, it contains a mapping between URL patterns and Python callback functions. URLconfs also serve to decouple URLs from Python code.
Here’s what a URLconf might look like for the Reporter/Article
example above:
news/urls.py¶from django.urls import path
from . import views
urlpatterns = [
path("articles/<int:year>/", views.year_archive),
path("articles/<int:year>/<int:month>/", views.month_archive),
path("articles/<int:year>/<int:month>/<int:pk>/", views.article_detail),
]
The code above maps URL paths to Python callback functions (“views”). The path strings use parameter tags to “capture” values from the URLs. When a user requests a page, Django runs through each path, in order, and stops at the first one that matches the requested URL. (If none of them matches, Django calls a special-case 404 view.) This is blazingly fast, because the paths are compiled into regular expressions at load time.
Once one of the URL patterns matches, Django calls the given view, which is a Python function. Each view gets passed a request object – which contains request metadata – and the values captured in the pattern.
For example, if a user requested the URL “/articles/2005/05/39323/”, Django
would call the function news.views.article_detail(request,
year=2005, month=5, pk=39323).
User management
Each view is responsible for doing one of two things: Returning an
HttpResponse object containing the content for the
requested page, or raising an exception such as Http404.
The rest is up to you.
Generally, a view retrieves data according to the parameters, loads a template
and renders the template with the retrieved data. Here’s an example view for
year_archive from above:
news/views.py¶from django.shortcuts import render
from .models import Article
def year_archive(request, year):
a_list = Article.objects.filter(pub_date__year=year)
context = {"year": year, "article_list": a_list}
return render(request, "news/year_archive.html", context)
This example uses Django’s template system, which has several powerful features but strives to stay simple enough for non-programmers to use.
Forms, user data, static files, and uploads
The code above loads the news/year_archive.html template.
Django has a template search path, which allows you to minimize redundancy among
templates. In your Django settings, you specify a list of directories to check
for templates with DIRS. If a template doesn’t exist
in the first directory, it checks the second, and so on.
Let’s say the news/year_archive.html template was found. Here’s what that
might look like:
news/templates/news/year_archive.html¶{% extends "base.html" %}
{% block title %}Articles for {{ year }}{% endblock %}
{% block content %}
<h1>Articles for {{ year }}</h1>
{% for article in article_list %}
<p>{{ article.headline }}</p>
<p>By {{ article.reporter.full_name }}</p>
<p>Published {{ article.pub_date|date:"F j, Y" }}</p>
{% endfor %}
{% endblock %}
Variables are surrounded by double-curly braces. {{ article.headline }}
means “Output the value of the article’s headline attribute.” But dots aren’t
used only for attribute lookup. They also can do dictionary-key lookup, index
lookup and function calls.
Note {{ article.pub_date|date:"F j, Y" }} uses a Unix-style “pipe” (the “|”
character). This is called a template filter, and it’s a way to filter the value
of a variable. In this case, the date filter formats a Python datetime object in
the given format (as found in PHP’s date function).
You can chain together as many filters as you’d like. You can write custom template filters. You can write custom template tags, which run custom Python code behind the scenes.
Finally, Django uses the concept of “template inheritance”. That’s what the
{% extends "base.html" %} does. It means “First load the template called
‘base’, which has defined a bunch of blocks, and fill the blocks with the
following blocks.” In short, that lets you dramatically cut down on redundancy
in templates: each template has to define only what’s unique to that template.
Here’s what the “base.html” template, including the use of static files, might look like:
templates/base.html¶{% load static %}
<html lang="en">
<head>
<title>{% block title %}{% endblock %}</title>
</head>
<body>
<img src="{% static 'images/sitelogo.png' %}" alt="Logo">
{% block content %}{% endblock %}
</body>
</html>
Simplistically, it defines the look-and-feel of the site (with the site’s logo), and provides “holes” for child templates to fill. This means that a site redesign can be done by changing a single file – the base template.
It also lets you create multiple versions of a site, with different base templates, while reusing child templates. Django’s creators have used this technique to create strikingly different mobile versions of sites by only creating a new base template.
Note that you don’t have to use Django’s template system if you prefer another system. While Django’s template system is particularly well-integrated with Django’s model layer, nothing forces you to use it. For that matter, you don’t have to use Django’s database API, either. You can use another database abstraction layer, you can read XML files, you can read files off disk, or anything you want. Each piece of Django – models, views, templates – is decoupled from the next.
Testing your project
This has been only a quick overview of Django’s functionality. Some more useful features:
A caching framework that integrates with memcached or other backends.
A syndication framework that lets you create RSS and Atom feeds by writing a small Python class.
More attractive automatically-generated admin features – this overview barely scratched the surface.
The next steps are for you to download Django, read the tutorial and join the community. Thanks for your interest!
Management commnands
Migration
APIs
Make your pages more dynamic with HTMX
Django power tools
Where to go next
Last update:
Jul 28, 2025