Linux and Linux API
Linux
Linux is one of the most popular operating systems for servers and cloud-based infrastructures. It gives access to a robust CLI (Command Line Interface), a scripting environment, essential tools and utilities, strong security features, and powerful diagnostic tools for troubleshooting. In order to master the art of delivering high-quality software and infrastructure, it is required for a DevOps Engineer to master Linux.
The REPL: Read iput, Evaluate command, Print input, Loop back to read input.
Opening Terminal (macOS):
pwd - print working directory¶$ pwd
/Users/TeslaPython
ls - list¶$ ls
Applications
Desktop
Documents
Downloads
library
Movies
Music
Music
Pictures
Public
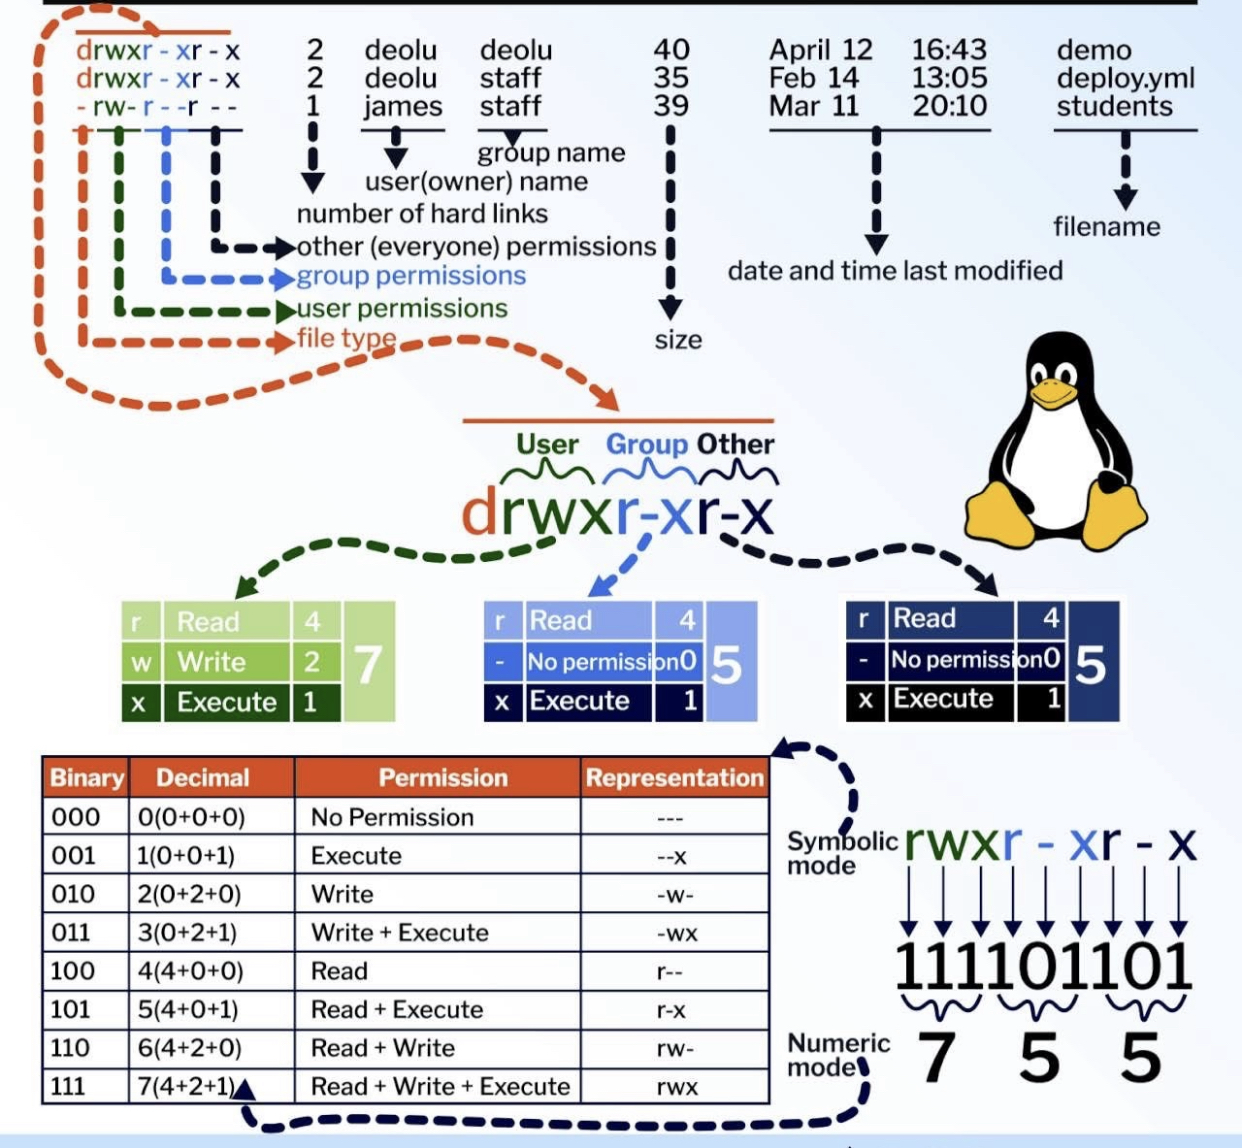
list -l(long) and -h(human-readable)¶$ ls -l -h
total 8
drwx------@ 5 TeslaPython staff 160 Mar 25 10:26 Applications
drwx------+ 19 TeslaPython staff 608 Mar 18 21:20 Desktop
drwx------+ 6 TeslaPython staff 192 Feb 1 22:22 Documents
drwx------@ 50 TeslaPython staff 1600 Apr 4 11:35 Downloads
drwx------@ 88 TeslaPython staff 2816 Mar 16 19:28 Library
drwx------ 3 TeslaPython staff 96 Dec 30 10:02 Movies
drwx------+ 4 TeslaPython staff 128 Dec 30 11:08 Music
drwx------+ 5 TeslaPython staff 160 Jan 25 18:39 Pictures
drwxr-xr-x+ 4 TeslaPython staff 128 Dec 30 10:02 Public
Now, we explain this:
cd - change directory¶$ pwd
/Users/TeslaPython
$ cd projects
$ pwd
/Users/TeslaPython/projects
find - find files¶$ find / TeslaPython
It means the above will search “/” the whole system with the name “TeslaPython”. Keep in mind that when you are not executing this as the all powerful root (administrator) user, “find” will not have permissions to list the contents of many directories, so you will receive output like find: ‘/root’: Permission denied
fing - find files¶$ find / -type d -name TeslaPython
The above will search “/” the whole system for a directory “-type d” with the name “TeslaPython”
less - Reading files¶$ less teslapython.txt
alabaster==1.0.0
asgiref==3.8.1
babel==2.17.0
cachetools==5.5.2
certifi==2025.1.31
For example, the above will read “teslapython.txt” file, to quit hit q.
mkdir - make a directory¶$ mkdir TeslaPython
$ ls
TeslaPython
rmdir - remove (empty) directories¶$ rmdir TeslaPython
$ ls
(nothing)
rm - remove (not empty) files and directories¶$ rm filename
rm -rf remove (not empty) files and directories¶$ rm -rf filename
The above will let you delete directories that are critical to the operation of your system. You’d like to delete the root directory, which contains everything on the system. -rf means recursively force.
Move or rename files and directories. First, we’ll create a file using touch:
mv - move or rename files and directories¶$ touch teslapython.txt
$ ls
teslapython.txt
Then, we’ll rename the file in place, this command would overwrite any existing file name teslapython.txt:
mv - move or rename files and directories¶$ touch teslapython.txt docsteslapython.txt
$ ls
docsteslapythonlab.txt
To move the file to a new directory, we’ll create a new directory and then move the file there:
mv - move or rename files and directories¶$ mkdir teslapythondir
$ mv docsteslapython.txt teslapythondir/
$ ls teslapythondir/
docsteslapython.txt
Remember you can always skim the relevant information using specific flags, “man” (man means manual) will print something like this:
man - getting help¶$ man find
NAME
find – walk a file hierarchy
SYNOPSIS
find [-H | -L | -P] [-EXdsx] [-f path] path ... [expression]
find [-H | -L | -P] [-EXdsx] -f path [path ...] [expression]
DESCRIPTION
The find utility recursively descends the directory tree for each path listed, evaluating an expression (composed of the “primaries” and “operands” listed below) in terms of each file in
the tree.
The options are as follows:
-E Interpret regular expressions following the -regex and -iregex primaries as extended (modern) regular expressions rather than basic regular expressions (BRE's). The re_format(7) manual page fully describes both formats.
Or using “apropos”
apropos - display online manual documentation pages¶$ apropos find
git-bisect(1) - Use binary search to find the commit that introduced a bug
git-cherry(1) - Find commits yet to be applied to upstream
git-merge-base(1) - Find as good common ancestors as possible for a merge
git-name-rev(1) - Find symbolic names for given revs
git-pack-redundant(1) - Find redundant pack files
strings(1) - find the printable strings in a object, or other binary, file
BIO_find_type(3ssl), BIO_next(3ssl), BIO_method_type(3ssl) - BIO chain traversal
Or using “whatis”
whatis - display online manual documentation pages¶$ whatis find
git-bisect(1) - Use binary search to find the commit that introduced a bug
git-cherry(1) - Find commits yet to be applied to upstream
git-merge-base(1) - Find as good common ancestors as possible for a merge
git-name-rev(1) - Find symbolic names for given revs
git-pack-redundant(1) - Find redundant pack files
strings(1) - find the printable strings in a object, or other binary, file
SPI_cursor_find(3) - find an existing cursor by name
XkbFindOverlayForKey(3) - Find the alternate name by using the primary name for a key that is part of an overlay
XkbLookupKeyBinding(3) - Find the string bound to a key by XRebindKeySym
XkbLookupKeySym(3) - Find the symbol associated with a key for a particular state
XkbTranslateKeySym(3) - Find the string and symbol associated with a keysym for a given keyboard state
Connecting to Remote Servers via SSH
SSH stands for Secure Shell. It is a cryptographic network protocol that allows secure communication between two systems. The default port for SSH is 22
ssh¶$ ssh -p 443 teslapython@216.24.57.252
Linux API
Why Linux API?
Development
Malware analysis
Vulnerability analysis and exploitation
Reversing
Diagnostics
Debugging
Monitoring
Memory forensics
Crash and hang analysis
Secure coding
Static code analysis
Trace and log analysis
What Linux API?
Source code prespective
ABI (Application Binary Interface) perspective: Libraries and Syscalls
Linux Networks, Security and Administrator
Linux Networks
Linux Gateway
Installing and configuring Minicom
Terminal Ubuntu¶> apt install minicom
> man minicom
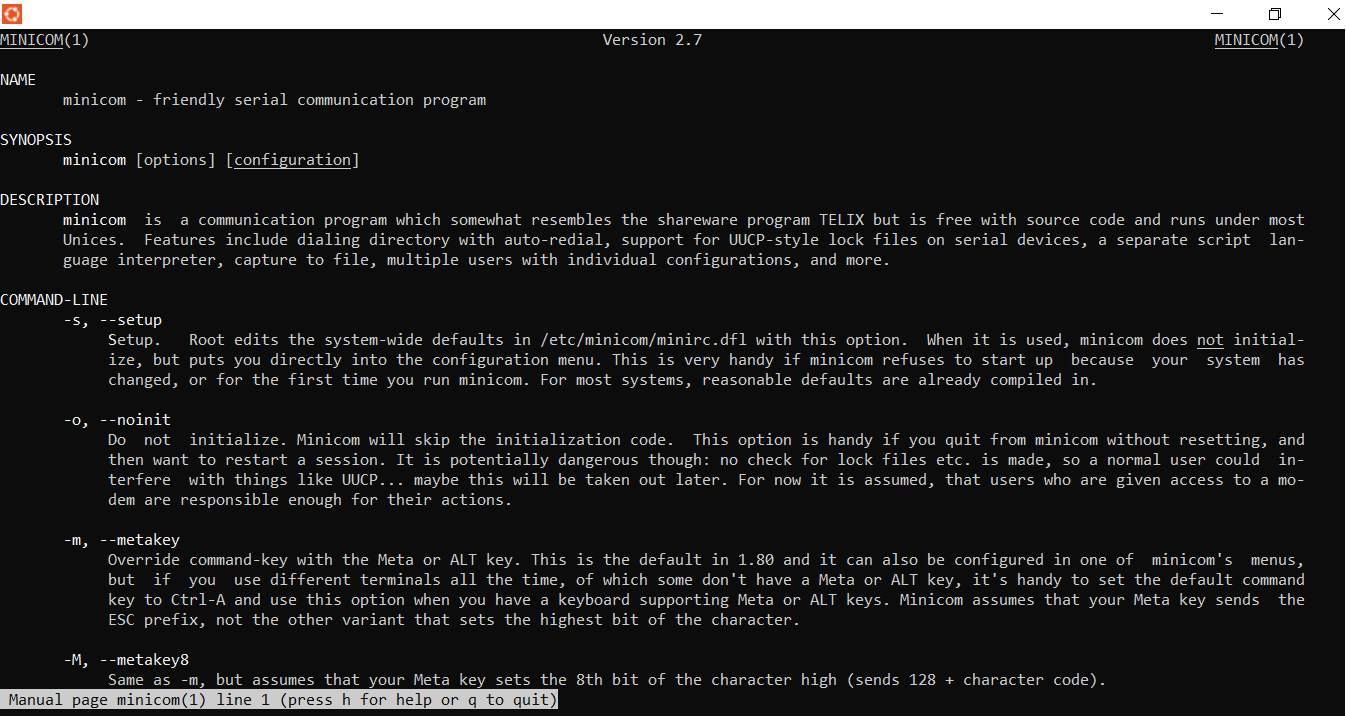
Setting up Minicom
Terminal Ubuntu¶> minicom -s
Linux Firewall
Linux Wireless Access Point
VoIP Server
Troubleshooting Networks
Linux Security
Linux Administrator
Linux programming techniques
Instaling a meta-package includes both GCC, GNU Make
First of all, install th build-essential package
> sudo apt install build-essential
Verify the installation by listing the version installed
> gcc --version
gcc (Ubuntu 13.3.0-6ubuntu2~24.04) 13.3.0

> make --version
GNU Make 4.3
Now, it’s time to try out the GCC compiler by compiling a minimal C program. Please type the source code into an editor and save it as hello_teslapython.c
> nano hello_teslapython.c

Press Ctrl+X –> choose Y –> press Enter
This command produces a file called a.out:
> gcc hello_teslapython.c
Now, let’s try to run the program
> ./a.out
Hello TeslaPython!
Now, recompile the program. Then, let’s rerun the program. This time, we will specify a name for the program with the -o option ( -o for output).
> gcc hello_teslapython.c -o hello_teslapython

> ./hello_teslapython
Hello TeslaPython!
Next, let’s try to compile it using Make instead:
> rm hello_teslapython
> make hello_teslapython
cc  hello_teslapython.c     -o hello_teslapython
> ./hello_teslapython
Hello TeslaPython!
Creating Your Own Shared Libraries
A dynamic library is dynamically linked to the binary that uses it.
Pros:
The resulting binary will be smaller in size since the library code isn’t included.
The library can be updated withour needing to recompile the binary.
Cons:
We can’t move or delete the dynamic library from the system.
Let’s start with creating a simple header file. Write the following content in a fiel and name it teslapython.h
> nano teslapython.h
Now, it’s time to write the actual function that will be included in the library. Write the code (like teslapython.h) in a file and save it as teslapython.c
> nano teslapython.c
Overall we need to convert this to a library somehow.
> gcc -Wall -Wextra -pendantic -fPIC -c teslapython.c
> ls -l teslapython.o
-rw-r--r-- 1 root root 1034 Jul 19 08:41 teslapython.o
On the other hand, we must package the object as a library. In the following command, the -shared option is just what it sounds like shared library. The -Wl,-soname,libteslapython.so options are for the linker. The -o option specifies the output filename, which is libteslapython.so (The so ending for shared object). This is a standard naming convention for dynamically linked libraries. At the very end of the command, we have the teslapython.o object file that is included in this library:
> gcc -shared -Wl,soname,libteslapython.so -o \
> libteslapython.so teslapython.o
Linking against a library in your home directory. Write the following source code in a file and name test_teslapython.c. This program will use the library we just downloaded.
Now compile it and link it to libteslapython.so. Since the library resides in our home dicrectory, we need to specify the path to it. We need to set the LD_LIBRARY_PATH
> gcc -L${root} -lteslapython test_teslapython.c -o test_teslapython
> export LD_LIBRARY_PATH=${root}:${root/teslapython}
We can finally run the program.
> ./test_teslapython 369
369 is not a prime
Now, we install a new library is for cURL, an application and library to fetch files or data form the internet (over HTTP)
> sudo apt install libcurl4-openssl-dev
Now, let’s take a look inside the library with nm
> nm -D /usr/lib/x86_64-linux-gnu/libcurl.so | grep " T " | head -n 1
000000000002c660 T curl_easy_cleanup@@CURL_OPENSSL_4
Next that we can use it in a program. Write the following code in a file and save it as teslapython-ip.c
> nano teslapython-ip.c
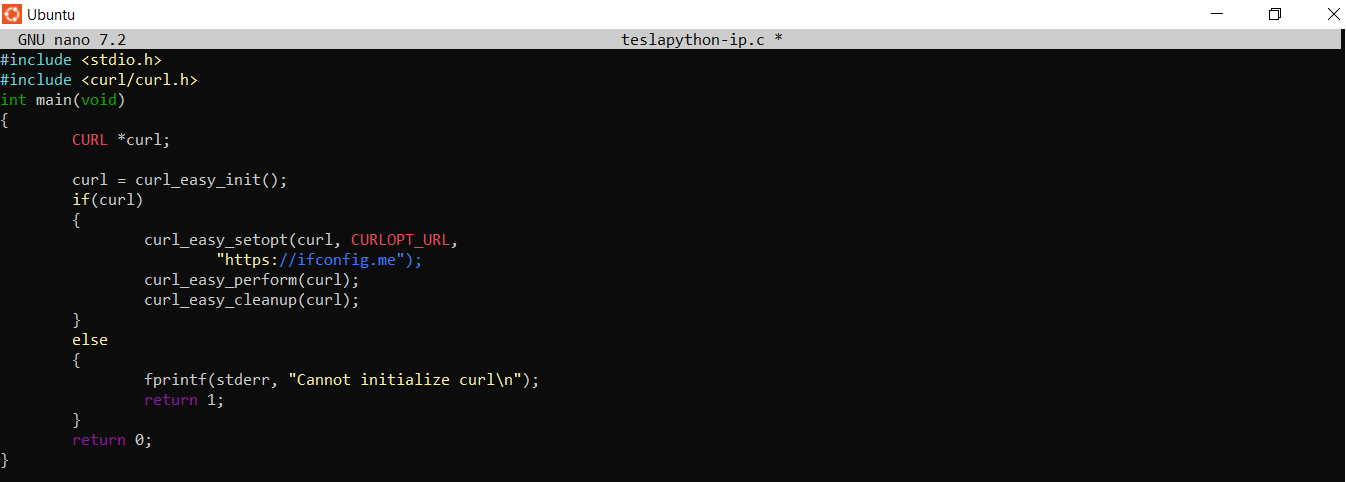
Compile the code
> gcc -Wall -Wextra -pedantic -std=c99 -lcurl teslapython-ip.c -o teslapython

> ./teslapython-ip
1.52.xx.xx
or we can visit the website https://ifconfig.me to get IP, or typr the following code:
> curl ifconfig.me
1.52.xx.xx
A static library is included inside the binary file.
Pros:
The advantage of this is that the binary will be completed independent of the library once compiled.
Cons:
The disadvantage is that the binary will be bigger, and the library can’t be updated without also recompiling the binary.
For this recipe, we’ll make a small static library. The library will contain two functions: one for converting Process Variable (PV) to 4-20mA and one for converting 4-20mA to PV. Write the following code in a file and save it as hart.h and hart.c respectively:
float pv_to_hart (float pv);
float hart_to_pv (float hart);
float pv_to_hart (float pv)
{
    percentage = (X-LRV)/(URV-LRV)*100
    return ((percentage + 25)/6.25)
}
float hart_to_pv (float hart);
{
    percentage = (Y*6.25)-25
    return((percentage*(URV-LRV))/100 +LRV)
}
X is Process Variable. Y is 4-20 mA.
ChatGPT for linux shell (not free of charge)
ShellGPT is OpenAI ChatGPT shell interface that provides an interactive experience to the user from the command line.
Installing python tools
$ brew install python3
$ brew install python3-pip
Setting up the virtual environment
$ python3 -m pip install virtualenv
$ mkdir ShellGPT
$ cd ShellGPT
$ python3 -m venv shellgpt
$ source shellgpt/bin/activate
Getting your OpenAI API key, add your OpenAI API key to .bashrc:
export OPENAI_API_KEY = <your-api-key-here>
Reload .bashrc:
$ source ~/.bashrc
Installing ShellGPT
$ pip install shell-gpt
For example:
$ sgpt --shell "command to add port 3000 to firewall using firewall command"
sudo firewall-cmd --zone=public --add-port=3000/tcp --permanent
[E]xecute, [D]escribe, [A]bort:
Last update:
Jul 28, 2025